Necessity is the mother of all invention and, back in 2020, a teacher built a stand out of LEGO to hold her mobile phone so that both her hands were free when conducting an online lesson.
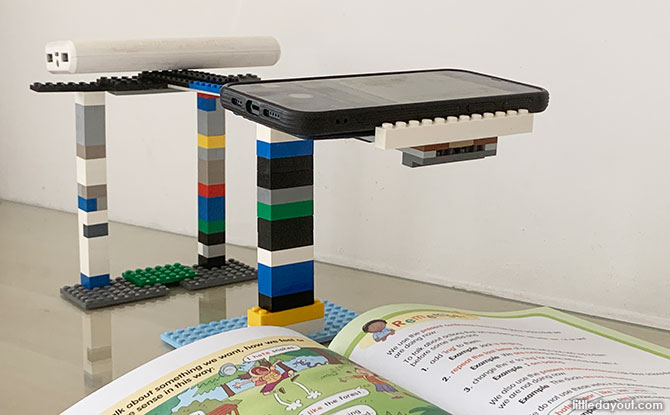
This served the same purpose as a visualiser or projector, which could be used to hold a mobile phone while conducting a lesson or for conducting story times.
Assembling the Pylons
Here are some steps on how to build a LEGO visualiser of your own.
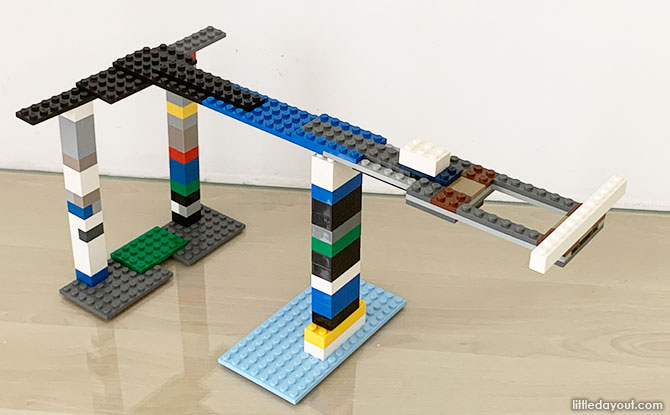
The LEGO visualiser is made up of three pylons and an arm to house the mobile phone.
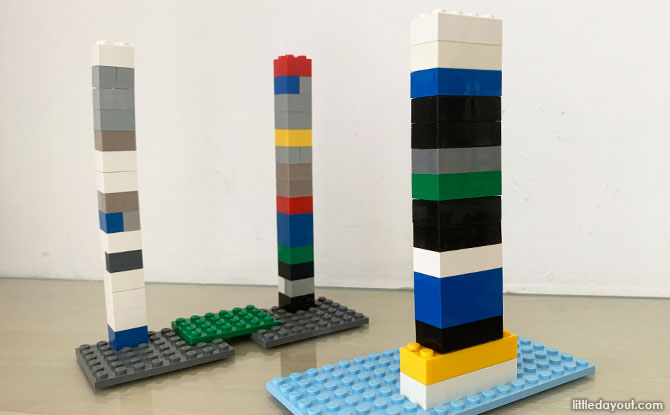
The pylon can be built out of either 2 x 2 bricks or 2 x 4 bricks, depending on what you have at your disposal. These can be placed on top of plates to give them a wider and more stable base.
For the pylons, it is important to get them high enough for the phone to be able to show the contents below. We found that stack of 15 to 20 bricks should be sufficiently high to elevate the phone.
An alternative way to elevate the visualiser without stacking more bricks is to place it on a higher surface.
Constructing the Arm
The second component of the visualiser is the arm which holds the mobile phone.
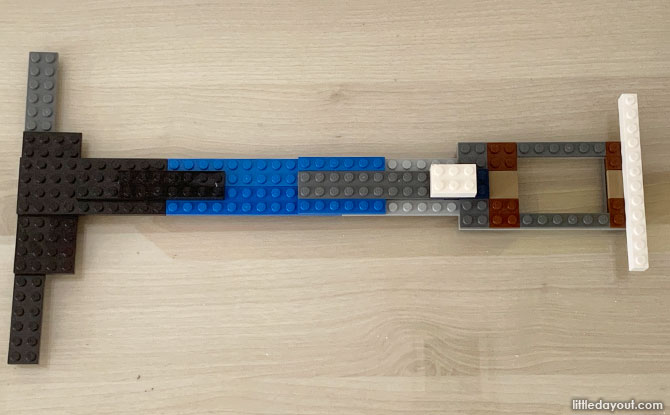
It needs to be long enough so the mobile phone can be positioned above the materials that wish to be shown. This can built out of 4-stud-wide LEGO plates. The joints where the LEGO plates meet can be reinforced both on top and below.
We created a wider base to hold the phone at one end. We also included guard rails to prevent the phone from slipping off.
At the other end of the arm, we also created a wide base to hold a counterweight. In this case, we used a rechargeable battery as a counterweight. Anything of roughly equivalently weight to the mobile phone can be used.
Building the LEGO Visualiser
The LEGO visualiser build can be completed by attaching the pylons to the arm. Place the counterweight on before placing the mobile phone.
And there you have it – a hands-free way to mount the mobile phone above some materials while conducting an online lesson or session.


